Hello! This week we'll go over piecing. This really is the tricky and most intimidating part.
Once you have down the technique for curved piecing, you'll think to yourself,
"oh my this is fantastic! give me more curves! Bring on the Single Girl!"
You'll laugh in the face of a double wedding ring. Right in its face. I promise you.
But back to the matters at hand.
our Cog and Wheel.
Step 1: LAY OUT YOUR BLOCK
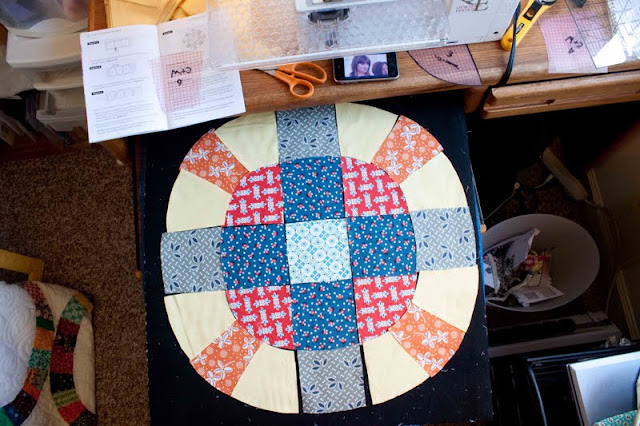
I find that laying out my block is a must for the cog and wheel. Usually I'm not really interested in strictness in laying things out before I sew and as you might expect, I often end up with blocks pieced in all sorts of "new and creative" ways that I didn't intend. Sometimes this is nice, not so much with curved piecing. I also recommend putting on an episode of Say Yes to the Dress on your iPhone as you can see I did. Each block is two and a half episodes for me:)
Step Two: PIECING THE CENTER STRIP
It doesn't really much matter which section you do first but I look at them as five sections illistrated below to keep my brain from tying in a knot and getting things sewn on wrong sides or upside down. It also allows me to chain piece to a certain extent which moves the process along a tad too.
Section 1 would be the center strip (or pieces 2 and 4 in your pattern) The top of piece 2 is curved and matches the bottom of piece 4. When you try to put right sides together to sew it, they obviously don't match up because of the curve so start by placing the right sides together, lined up just matching up the ends as pictured. Stitch a few stiches and then put your needle down and lift your presser foot.
Adjust the next small section so that it matches up and sew a few more stiches. Continue this process till you get to the end. The end will be a little tricky and you will have to sew and really hold the ends together slowly but don't get too caught up on perfect matching up here. This piece is pretty forgiving.
CAUTION:
I'll say this a million times more for this part. Because you are sewing with fabric cut on the bias (against the grain of the weave of the fabric) it is super stretchy and easy to really pull the fabric out of shape and end up with extra or short on a side. Just bring the fabric up to meet the piece you are matching it up with gently. A teeny tiny
tug is okay but don't pull or stretch.
Step 3: Piecing the curved sides
Sections 2 and 2b are easy and match up like any square piece would except on the curved end you will find that the piece of the fabric that matches up is on the point of the fabric that will be the 1/4" seam.
(see below)
If you start sewing on the curved side, that's what will match up. If you are sewing on the 90 degree angle side, it matches up like any square piece does.
Once you sew it, it is even on the curved sides
(see below)
Sections 3 and 3b are the same in that you just make sure the places the fabric matches up is where the seam will be at 1/4 inch. (the pictures above are from piecing sections 3 and 3b). These two parts really lend themselves well to chain piecing.
Once you have all five sections pieced together, its time to turn them into three parts from the five. You will sew sections 2&3 together and 2b&3b together.
Step 4: Piecing your first big curves
Lay them out again like so.
Fold them in half and pinch the crease to mark it.
Match the crease and pin it.
Match the seams and pin those.
Continue to pin in half and match creases until pinned all the way.
CAUTION:
To all those out there who are not usually big pinners, let me take this moment to encourage you to pin just this time. Again because you are using fabric cut on the bias, it is WAY to easy to stretch and pull the fabric so that you end up with things way off and not matching up.
JUST PIN IT!
Step 5: Sew ALL sections together
This is the easy one.
Step 6: Sewing the outer corners onto the inner circle
Take four corner pieces and sew them into a circle. It will look like a square that just had a circle cut out of the center.
Fold center circle into half and then fourths to crease fold to mark centers of pieces. You can even throw a pin onto each of these creases to mark them and be ready since you will be pinning together there shortly.
Match up the seams of your outer corner piece to the crease in the center of your inner circle piece
(pictured below)
Create the same fold/crease in the center of your next patterned piece (piece #4 in the original pattern) and make a correponding crease in the middle of the outer corner piece. This can be done easily by folding the corer in half as if it were a square)
Once you do that all the way around it will look like this. May I just take this opportunity to really encourage you to pin this really thoroughly all the way around. It will make it much less likely that you will end up with puckers or pockets where the fabric bunched up or stretched.
Pinning is way less tedious that picking out your stitches.
 |
| something about this picture makes me want to bake an apple pie..... |
Once you get that bad boy all pinned up you can just sew all the way around. Take time and go slowly to keep things from bunching as again, bias cut fabric can be persnickety.
There you have it! You're done!
Tune in next Monday for finishing......


